
2026/07/21
Anime Character Prompt Guide: Build a Repeatable OC
Write anime character prompts for face, outfit, pose, camera, and setting. Use practical templates, diagnose weak results, and refine one detail at a time.
An anime character prompt works best when it reads like a compact design brief, not a pile of flattering adjectives. Name the person, the visible traits that make them recognizable, the action, the framing, and the environment. Then generate one image, inspect what actually appeared, and revise the largest mismatch.
This anime character prompt guide is for writers, role-players, indie game teams, social creators, and illustrators who need an original character concept they can explain and refine. It is written around Anime Maker's current workflow: the anime character generator returns one 1024 × 1024 raster image from a text brief, a normal generation usually costs 1 credit, and the prompt field accepts up to 2,500 characters. It does not create editable layers or lock the same identity across separate generations.
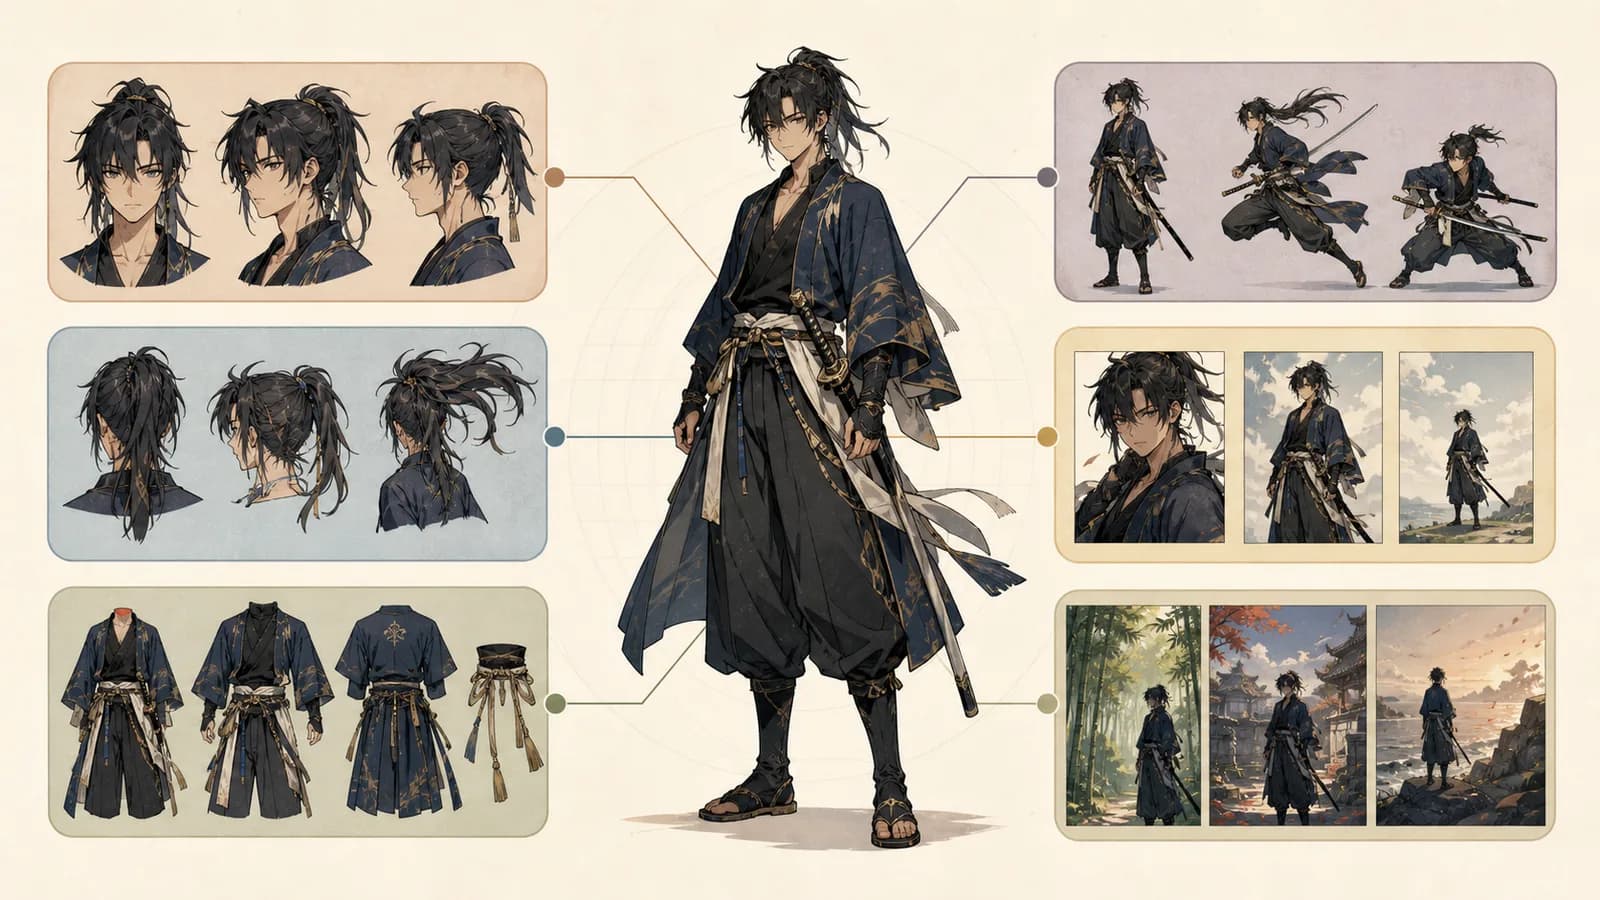
Quick answer: what should an anime character prompt include?
Use six blocks in this order:
- Identity: role, age range, temperament, and story function.
- Face and hair: face shape, eyes, brows, hair shape, and one memorable feature.
- Outfit: silhouette, garment construction, materials, palette, and accessories.
- Pose and expression: one readable action and one emotional signal.
- Camera and light: shot size, angle, focal emphasis, and light direction.
- Background and output: a setting that supports the role, plus any empty space or presentation requirement.
That order is a working framework, not a syntax the model requires. Google Cloud's official image prompt guide similarly starts with subject, context, and style, then recommends adding details through iteration. Adobe's Firefly guidance also favors clear, direct descriptions and treats lighting and camera angle as useful controls. The common lesson is simple: put visible decisions in the prompt, then revise from evidence in the result.
Contents
- Start with a character brief
- Describe face and hair
- Write a usable outfit block
- Control pose and expression
- Choose camera and background
- Copy the prompt templates
- Diagnose weak results
- Build consistency
- Prepare for publication
- Read the FAQ
Start with a character brief, not a wall of tags
Before choosing eye color, write one sentence that explains why the character exists. A useful brief answers three questions: What does this person do? What contradiction makes them interesting? What must a viewer understand before reading any dialogue?
Compare these two openings:
beautiful anime girl, masterpiece, detailed, amazing, cool, high quality
Night-shift bicycle courier who acts fearless but checks every dark doorway; practical city clothes with one carefully repaired family keepsake.
The second version gives every later choice a job. A weatherproof jacket belongs to the courier role. A tense sideways glance shows caution. A repaired pendant can become the signature detail. The first version supplies praise but no design problem to solve.
Write the identity block with:
- Role: courier, apprentice botanist, retired arena medic, shrine caretaker, student investigator.
- Age range: child, older teen, young adult, middle-aged, older adult. Avoid contradictory age cues.
- Temperament: guarded, impatient, methodical, warm but formal, curious under pressure.
- Story tension: wants recognition but avoids attention; protects others while hiding an injury.
- Two anchors: a split eyebrow and brass ear cuff; triangular rain cape and orange messenger strap.
Two anchors are usually more useful than ten accessories. They give the eye something to remember without turning the silhouette into clutter. If the character will appear in several scenes, choose anchors that remain visible at portrait and full-body distance.
Describe a face without losing the character
“Pretty face” is hard to evaluate. A face block should describe geometry and expression in ordinary language. You do not need anatomical jargon; you need details that can be seen.
Use this sequence:
| Field | Weak wording | More useful wording |
|---|---|---|
| Face shape | cute face | soft square face with a short chin |
| Eyes | beautiful blue eyes | wide-set gray-blue eyes, heavy upper lashes |
| Brows | nice eyebrows | straight dark brows, left brow split by a small scar |
| Nose and mouth | perfect features | small straight nose, narrow mouth held slightly tense |
| Hair | cool black hair | chin-length black bob, blunt fringe, one longer lock at the right cheek |
| Expression | emotional | trying not to smile after hearing good news |
Treat hair as a shape before treating it as a color. “Long red hair” can become dozens of unrelated designs. “Thick copper braid over the left shoulder, short flyaways around the temples, dark roots” provides length, structure, direction, and color variation.
Do not demand five emotions in one still image. Pick a primary emotion and, if needed, a restrained secondary cue: “relieved, but still watching the exit.” That instruction can show up in the mouth, eyelids, shoulders, and gaze. “Happy, sad, angry, mysterious, confident” cannot.
For a profile picture, prioritize face shape, eyes, hairline, and one accessory. For a full-body design, shorten the face block and spend more space on silhouette, clothing, and stance. The square canvas cannot give every detail equal attention.
Turn an outfit idea into visible construction
Outfit prompts often fail because they name a genre instead of clothing. “Fantasy outfit” does not say what covers the torso, how the garment closes, or where the colors repeat. Describe the big silhouette first, then construction, material, palette, and wear.
Use a five-part outfit block
- Silhouette: cropped jacket over wide trousers; long fitted coat with a high collar; rounded work apron over a straight dress.
- Construction: offset zipper, rolled sleeves, reinforced knees, asymmetrical hem, two visible utility pockets.
- Material: matte canvas, worn leather, quilted cotton, translucent rain fabric, brushed metal.
- Palette: charcoal base, muted teal panels, one coral strap. Limit major colors so the design can be recalled.
- Story wear: sun-faded shoulders, stitched repair at the elbow, clean ceremonial shoes, ink stains on the right cuff.
Small wear marks make an outfit feel used, but they should support the character's life. Random scratches on every surface create noise. A mechanic may have grease at the cuff; an archivist may have dust and pencil marks; a diplomat may keep an old coat immaculate except for a repaired lining.
Avoid generated text, badges, franchise emblems, or precise logos in the clothing brief. Image models can produce text-like marks that look intentional at a glance but fail under inspection. If the character needs an organization symbol, ask for “a simple original three-leaf brass emblem” and redraw the final mark yourself. For a finished identity asset, the anime logo maker can help explore a separate symbol concept, but final lettering and trademark review still belong in a design workflow.
Give the character one readable pose
A pose is not a personality adjective. Translate “confident” into physical evidence: feet planted apart, shoulders relaxed, chin level, one hand holding a helmet at the hip. Translate “uncertain” into an uneven stance, guarded elbows, and a gaze that avoids the camera.
A reliable pose line includes:
- Body orientation: facing front, three-quarter view, side profile, back turned with head looking over shoulder.
- Weight: evenly planted, weight on the rear foot, leaning into a sprint, seated forward on the chair edge.
- Hands: one clear job for each visible hand.
- Gaze: at camera, toward an off-frame sound, down at an object, past another character.
- Expression: one primary emotion with a physical cue.
Hands compete easily with props. “Holding a map, a phone, a sword, and a cup while adjusting glasses” overloads a single figure. Give the character one important prop and let the other hand rest, brace, point, or stay outside the crop.
For action, describe a readable instant rather than a whole sequence. “Landing from a short jump, coat hem still lifted, left boot touching first” is a frame. “Runs through the city, fights three guards, escapes, and celebrates” is a montage. If you eventually need movement, begin with a stable character image and plan the shot separately in the site's AI anime image generator or image-to-video workflow.
Use camera, light, and background to support the role
Camera language changes what the prompt can show. A close-up gives the face more pixels but may hide the outfit. A full-body view tests silhouette and footwear but makes tiny jewelry less reliable. Choose the shot from the decision you need to make.
| Decision to review | Useful framing | What to simplify |
|---|---|---|
| Face and emotion | close-up or head-and-shoulders | legwear, small props |
| Upper outfit and identity | waist-up three-quarter view | shoes, distant scenery |
| Full silhouette | full-body eye-level view | micro facial detail |
| Power or threat | restrained low angle | busy ceiling or skyline |
| Vulnerability or scale | high angle or wide shot | tiny accessories |
| Character sheet draft | neutral full-body presentation | dramatic action and scenery |
Camera terms are not secret commands. They are compact ways to state framing and viewpoint. The Google Cloud guide lists proximity, camera position, lighting, and lens-like descriptors as ways to alter image results. Use only the terms you understand. “Waist-up, eye level, centered slightly left” is often more useful than stacking several lens numbers and film terms that pull in different directions.
Light should reveal the design. Start with one source: soft window light from the left, overhead fluorescent light, warm sunset rim light, or cool vending-machine light from below. Then add a restrained fill or environmental bounce only if it matters. Multiple suns, neon colors, fog, sparks, and hard rim lights can bury outfit colors.
The background should answer “where is this person and what were they doing?” without becoming a second protagonist. Use three layers:
- Near: one prop or edge that places the viewer, such as a bicycle handlebar.
- Middle: the character and their action.
- Far: a simplified setting, such as a rain-dark delivery alley with closed shop shutters.
If the image will become a profile card, ask for a simple background with clear separation. If it will become a story keyframe, include one environmental clue and reserve negative space where captions or UI may go.
Copy and adapt these anime character prompt templates
These templates are starting structures. Replace every bracketed field, remove any line that does not affect the picture, and keep the final prompt under the interface limit.
Original character portrait prompt
Original anime character portrait of [role and age range], [temperament and story tension].
Face: [face shape], [eyes and brows], [nose/mouth], [signature facial detail].
Hair: [shape, length, part/fringe, color variation].
Outfit visible from the chest up: [collar/jacket/top], [material], [two main colors], [one signature accessory].
Expression and gaze: [one emotion with physical cue], looking [direction].
Camera: head-and-shoulders, eye level, three-quarter view, character placed slightly [left/right].
Lighting: [one main light source] with clean separation from the background.
Background: simple [setting cue], subdued detail, no lettering, no watermark.
Full-body OC design prompt
Full-body anime character design for an original [story/game/role-play] character.
Identity: [role], [age range], [two personality traits], recognizable by [anchor 1] and [anchor 2].
Proportions and face: [build], [face shape], [eyes], [hair construction].
Outfit silhouette: [large shape]. Construction: [closures, seams, pockets, hem].
Materials and palette: [materials], [base color], [secondary color], [small accent color].
Footwear and prop: [shoes], holding one [story-relevant prop].
Pose: [orientation], weight [placement], [specific hand positions], [gaze and expression].
Camera: full body from head to feet, eye level, readable silhouette.
Presentation: simple light background, soft ground shadow, no text, no existing franchise symbols.
Story keyframe prompt
Anime story keyframe featuring an original [role] at [specific location and time].
Stable identity details: [face], [hair], [outfit], [two signature anchors].
Visible moment: [one action frozen at a clear instant].
Emotion: [primary feeling], shown through [eyes/mouth/shoulders/gaze].
Composition: [shot size and angle], character in the [frame position], foreground [one element], background [one setting clue].
Lighting and palette: [source and direction], [three-color mood].
Leave clear negative space at [location] for later layout. No generated captions, logos, or watermark.
Character-sheet-style draft prompt
Square anime character reference-sheet draft for one original [role].
One dominant full-body front three-quarter view plus two small head studies showing [expression 1] and [expression 2].
Repeat exactly these visible anchors across all views: [hair shape], [eye color], [outfit construction], [accessory], [mark/scar].
Neutral standing pose, plain light background, consistent palette, clear spacing between views.
No text labels, no measurements, no watermark. Treat as a visual planning draft, not an editable production sheet.
The last template asks one square image to contain several views, so details may drift. For production, generate a strong main view first, document it, and build a real sheet manually from selected and corrected images.
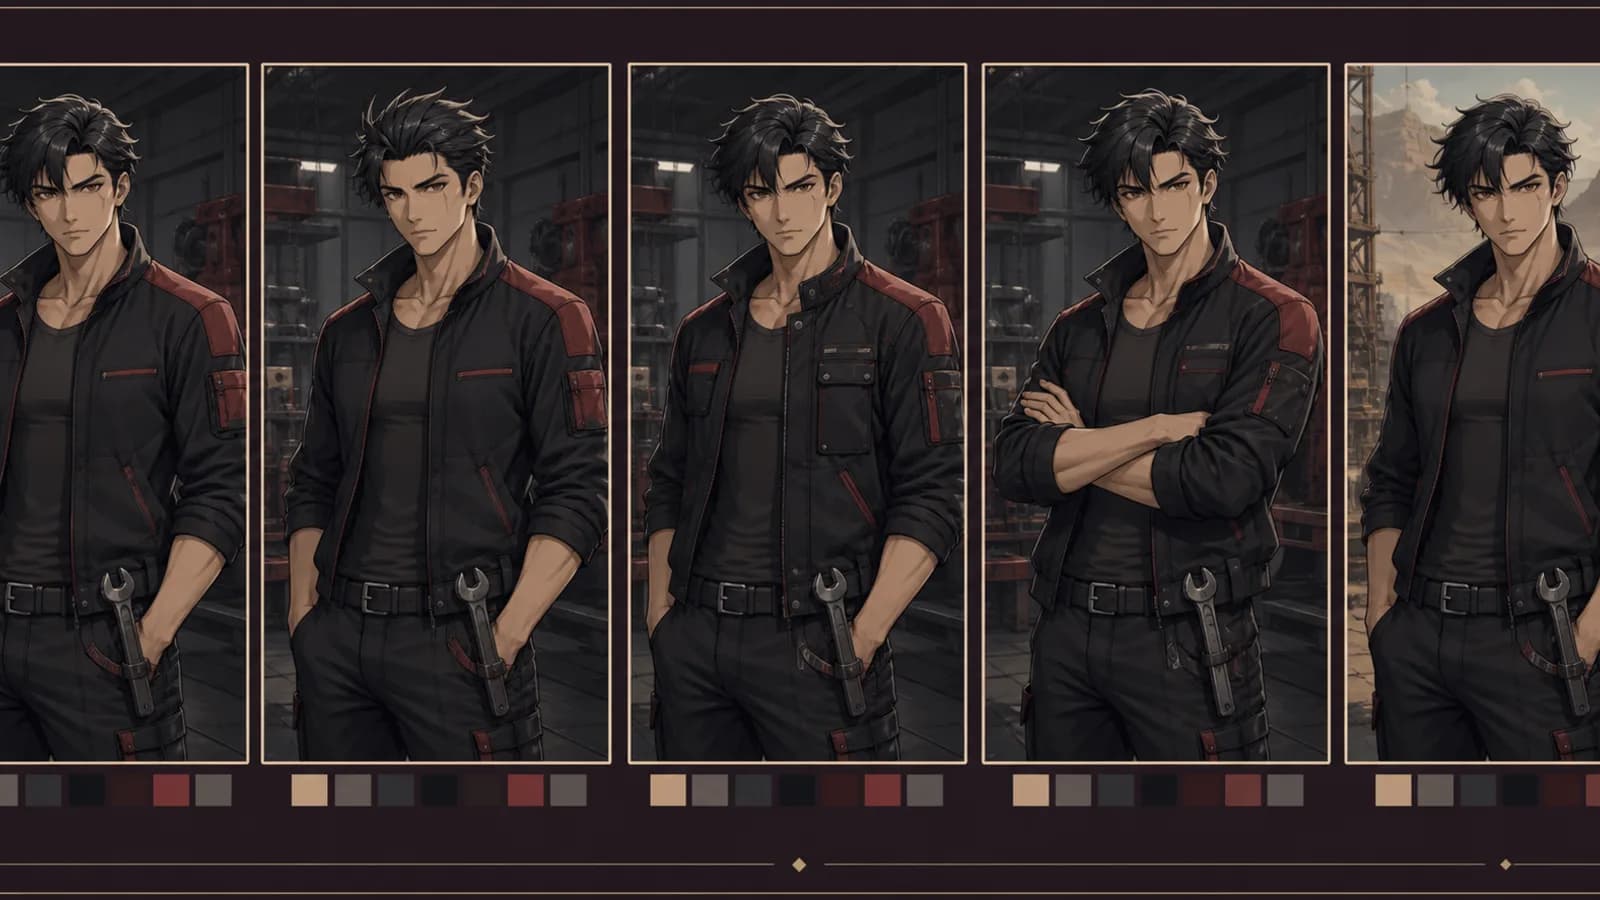
A real prompt revision, line by line
Suppose the assignment is a young urban courier who looks capable but not invincible. A vague prompt might be:
cool cyberpunk anime courier girl, dramatic city, detailed clothes, cinematic
Instead, turn the decision into a brief:
Original young-adult bicycle courier at the end of a rainy night shift, alert but exhausted.
Soft square face, gray-blue wide-set eyes, straight brows with a small split in the left brow.
Chin-length black bob with blunt fringe and one longer lock at the right cheek.
Charcoal waterproof cropped jacket, matte fabric, reflective teal shoulder panels, coral messenger strap, repaired brass pendant.
Waist-up three-quarter view, shoulders turned toward the bicycle, head looking back at an off-frame sound, left hand gripping the wet handlebar.
Eye-level camera. Cool shop light from the right, faint warm street reflection from below.
Closed delivery alley after rain, simple shutters and pavement reflections, subdued background, no signs or text.
Every sentence has a review target. If the face is correct but the coat becomes glossy armor, change “waterproof” to “matte woven rain fabric, flexible seams, no armor plates.” If the character feels relaxed, tighten only the pose line: “elbows close to the body, knuckles tense on the handlebar, gaze fixed beyond the frame.” Do not rewrite the face at the same time.
Diagnose a weak result before rewriting everything
Generation is sampling, so a clear prompt improves direction but does not guarantee exact execution. Diagnose the image by category and revise one variable per test.
| Symptom | Likely cause | Next prompt change |
|---|---|---|
| Character looks generic | role and anchors are vague | add one contradiction and two visible anchors |
| Face changes between attempts | too many identity details changed | freeze one reusable face-and-hair block |
| Outfit is crowded | too many accessories or colors | keep one prop, one accent, and two anchors |
| Important shoes are cropped | framing conflicts with review goal | say “full body from head to feet, margin below shoes” |
| Pose feels stiff | adjective replaces body mechanics | specify weight, hands, gaze, and one action instant |
| Background steals attention | equal detail and contrast everywhere | simplify distant layer and lower its contrast |
| Colors drift | palette is broad or poetic | name base, secondary, and accent colors by object |
| Unreadable marks appear | prompt asks for labels or logos | remove lettering; add real type later |
| Hands fail around a prop | hand action is crowded or hidden | use one prop, visible grip, simple camera angle |
Use a short test log:
Version: 03
Kept: face block, hair block, charcoal/teal/coral palette
Changed: full-body to waist-up; removed map; left hand now grips handlebar
Result: face and pose improved; pendant disappeared
Next test: enlarge pendant and remove ear cuff, no other changes
This record is more valuable than an enormous “perfect prompt.” It tells you which wording produced a useful decision. It also helps a collaborator distinguish generated variation from intentional art direction.
Build a small character record for future images
Anime Maker does not train or lock a private character model from one generation. Repeating a prompt block can reduce accidental changes, but exact continuity is not promised. Build a compact record outside the tool:
- the approved image and generation date;
- the exact face, hair, outfit, and palette blocks;
- two signature anchors that must not change;
- a list of details that may vary by scene;
- manual corrections made after generation;
- source references and permission notes;
- three small palette swatches with color values;
- naming conventions for versions and exports.
When creating a new scene, paste only the identity details visible in that shot. A close-up does not need boot construction. A back view does not need mouth shape. Keep the full record as the review standard rather than forcing every fact into every prompt.
If you start from a real portrait instead of a text-only OC, use photo to anime AI and upload only an image you have the right to use. That workflow uses the photo to anchor visible identity, pose, composition, and clothing, but it still creates a new 1024 × 1024 interpretation rather than a pixel-for-pixel filter.
Check rights, accessibility, and final use
An original-sounding prompt does not prove that an output is legally original. Inspect silhouettes, costume shapes, emblems, signatures, text-like marks, and close resemblance to known characters. Use references you created, licensed, or have permission to use. Commercial rights depend on the active provider, your plan and agreements, the source material, the amount of human authorship, and the law in the relevant country.
For U.S. context, the U.S. Copyright Office's 2025 report on AI copyrightability says copyright protection can apply where a human author determines sufficient expressive elements, including creative arrangement or modification, while prompts alone do not automatically supply that authorship. This is not a worldwide rule or legal advice; record your own selection, editing, redrawing, layout, and writing work, and consult a qualified professional when the release matters.
If the image is published on a website, write alternative text for its purpose in that context. The W3C Web Accessibility Initiative advises a brief description for an informative image, function-focused alt text for an image used as a control, and an empty alt attribute for a purely decorative image. Do not stuff the prompt into alt. A useful example would be: “Original bicycle courier in a charcoal rain jacket looks back in a neon-lit alley.”
Publication checklist
- Inspect face, hands, clothing edges, perspective, and accidental symbols at full size.
- Confirm that references, names, logos, and fonts are original or authorized.
- Add final captions, UI, and lettering as real text in a design editor.
- Crop and export for the actual destination; keep the 1024 × 1024 source.
- Write context-specific alt text or mark a decorative image with empty alt.
- Save the prompt, chosen output, edits, source permissions, and final version together.
- Do not present a fictional or transformed person as documentary evidence.
Sources and further reading
- Google Cloud: Image generation prompt guide — subject, context, style, iteration, camera, and lighting examples.
- Adobe Firefly: Writing effective text prompts — direct language, descriptive detail, lighting, and manual refinement.
- W3C WAI: Alt decision tree — choosing informative, functional, or empty alternative text.
- U.S. Copyright Office: Copyright and Artificial Intelligence, Part 2 — the Office's U.S. analysis of human authorship and AI-generated material.
These sources describe their own products or legal and accessibility frameworks. The Anime Maker limits stated in this guide come from the site's current interface and generation route, not from those external tools.
Frequently asked questions
How long should an anime character prompt be?
Long enough to define the decisions visible in the chosen shot, but not long enough to include the whole biography. A portrait may need six to ten compact lines. Anime Maker accepts up to 2,500 characters, yet a shorter prompt with a clear role, face, outfit, pose, camera, and background is easier to diagnose.
What is the best anime character prompt structure?
Start with identity, then write face and hair, outfit, pose and expression, camera and light, and background. Put stable identity details before scene details. The order is useful because it separates what should remain recognizable from what can change between images.
How do I keep the same anime character across prompts?
Save and reuse the exact face, hair, outfit, palette, and signature-detail blocks. Change only the pose, expression, camera, or setting for each test. This improves continuity, but separate generations can still vary because the current character generator does not lock an identity model.
Should I use negative prompts?
Use direct positive instructions first: “one prop,” “plain background,” and “full body with space below the shoes.” If an unwanted element repeats, add a short exclusion such as “no lettering or watermark.” Long negative lists can compete with the design brief and make diagnosis harder.
Can I copy the style of a specific anime artist or studio?
Build a visual direction from observable traits instead: line weight, shape language, palette, lighting, period, material, and mood. Avoid using a living artist's name or protected franchise as a shortcut. A specific art-direction brief is easier to revise and supports a more original result.
Can the generator make a production-ready character sheet?
It can make a square reference-sheet-style draft, but not an editable layered production sheet. Multi-view details may drift inside one image. Use the strongest generation as a concept, then correct turnarounds, proportions, labels, expressions, and palette specifications in a drawing or layout application.
Put the guide into practice
Choose one design decision for the first pass: face, upper outfit, full silhouette, or story mood. Fill in the matching template, generate one image with the anime character generator, and record what you kept. A useful anime character prompt is not the longest one; it is the one that makes the next revision obvious.
Author

Categories
Quick answer: what should an anime character prompt include?ContentsStart with a character brief, not a wall of tagsDescribe a face without losing the characterTurn an outfit idea into visible constructionUse a five-part outfit blockGive the character one readable poseUse camera, light, and background to support the roleCopy and adapt these anime character prompt templatesOriginal character portrait promptFull-body OC design promptStory keyframe promptCharacter-sheet-style draft promptA real prompt revision, line by lineDiagnose a weak result before rewriting everythingBuild a small character record for future imagesCheck rights, accessibility, and final usePublication checklistSources and further readingFrequently asked questionsHow long should an anime character prompt be?What is the best anime character prompt structure?How do I keep the same anime character across prompts?Should I use negative prompts?Can I copy the style of a specific anime artist or studio?Can the generator make a production-ready character sheet?Put the guide into practice
More Posts
Production guides
Anime Camera Angles: A Practical Storytelling Guide
Plan anime camera angles that clarify story, emotion, and screen direction. Compare shot sizes, build a shot list, and write prompts you can test.
Production guides
Comic Panel Layout Guide: Control Flow and Pacing
Use this comic panel layout guide to plan readable grids, gutters, focal panels, dialogue space, page turns, and mobile-friendly story flow for print or phone.
Production guides
Comic vs Manga vs Manhwa: A Practical Comparison
Compare comic vs manga vs manhwa by publishing tradition, reading direction, color, layout, serialization, workflow, and the format your story needs most.
Newsletter
Join the community
Subscribe to our newsletter for the latest news and updates