
2026/07/21
How to Make a Manga: A Practical 9-Step Workflow
Learn how to make a manga from premise to publishable pages: script, thumbnails, character sheets, panels, lettering, quality checks, and export.
To make a manga, define the reading format, write a short chapter script, thumbnail every page, lock the character designs, build the final pages, letter them, and test the result at its actual reading size. The drawing matters, but the order of decisions matters more. A clean thumbnail can save hours of polishing a page that does not read.
This guide is for solo creators and small teams making a one-shot, a pilot chapter, or a short vertical episode. It treats AI as a planning and visual-development aid—not a substitute for authorship, editing, or the rights you need to publish your work.
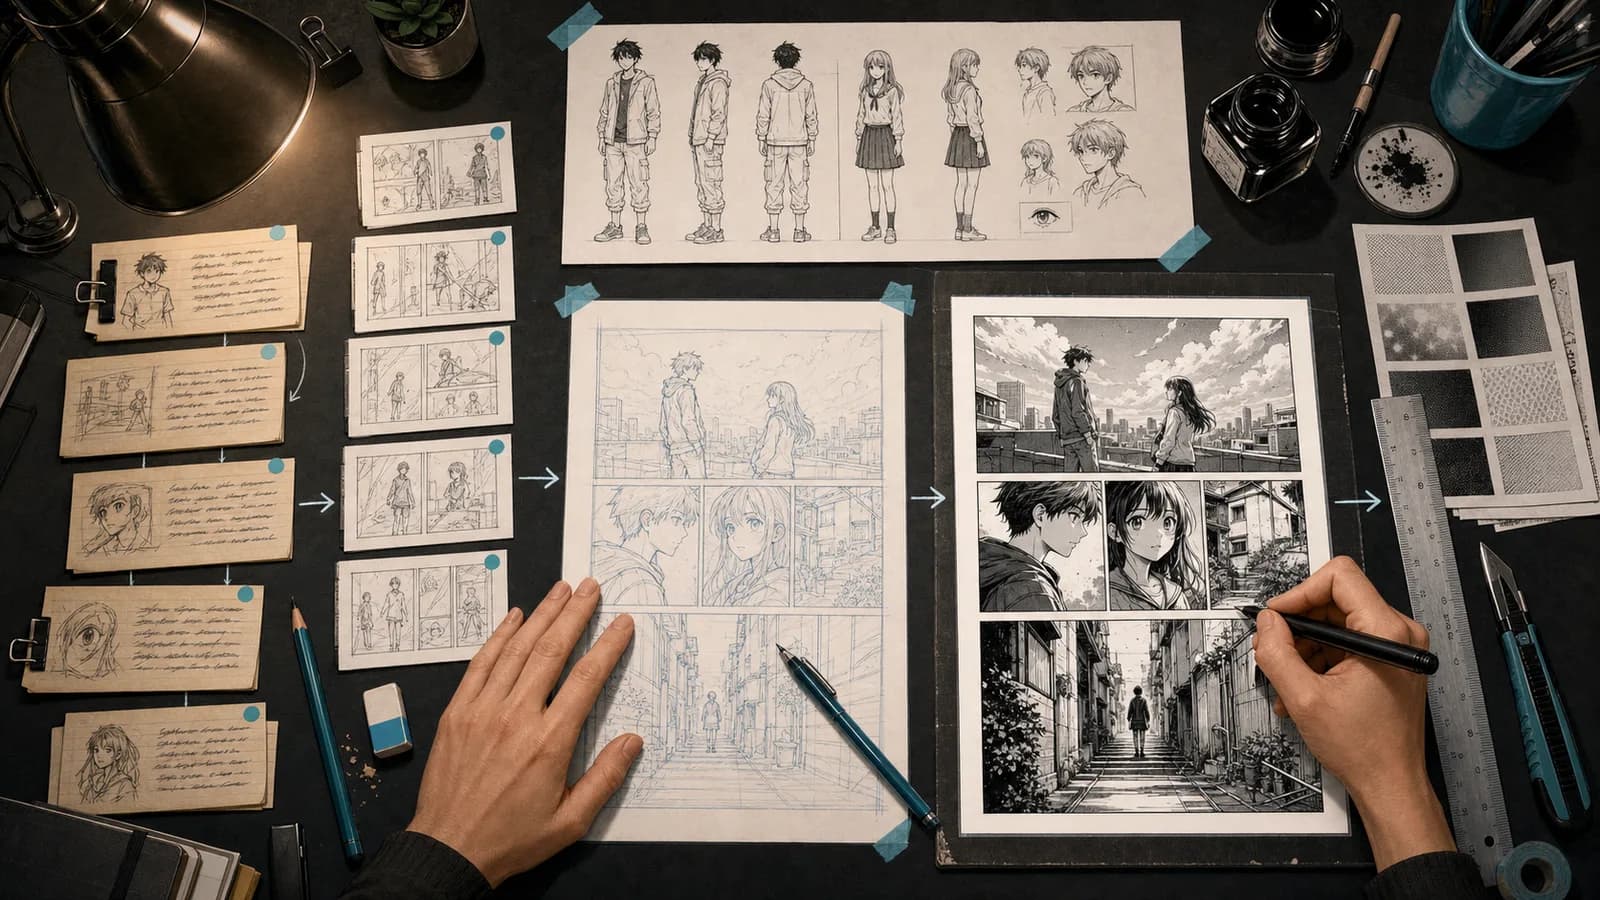
The manga workflow at a glance
- Choose print pages or vertical scroll.
- Define the premise, reader promise, and chapter goal.
- Write beats before dialogue.
- Turn the beats into a page-by-page script.
- Thumbnail the whole chapter.
- Create a character and location reference pack.
- Draw or assemble the final pages in passes.
- Letter, proof, and test the reading flow.
- Export for the exact platform or printer.
The useful rule is simple: solve story problems while changes are still cheap. Move a thumbnail before you repaint a background; shorten a speech before you resize five balloons; test a page turn before you ink the reveal.
1. Decide where the manga will be read
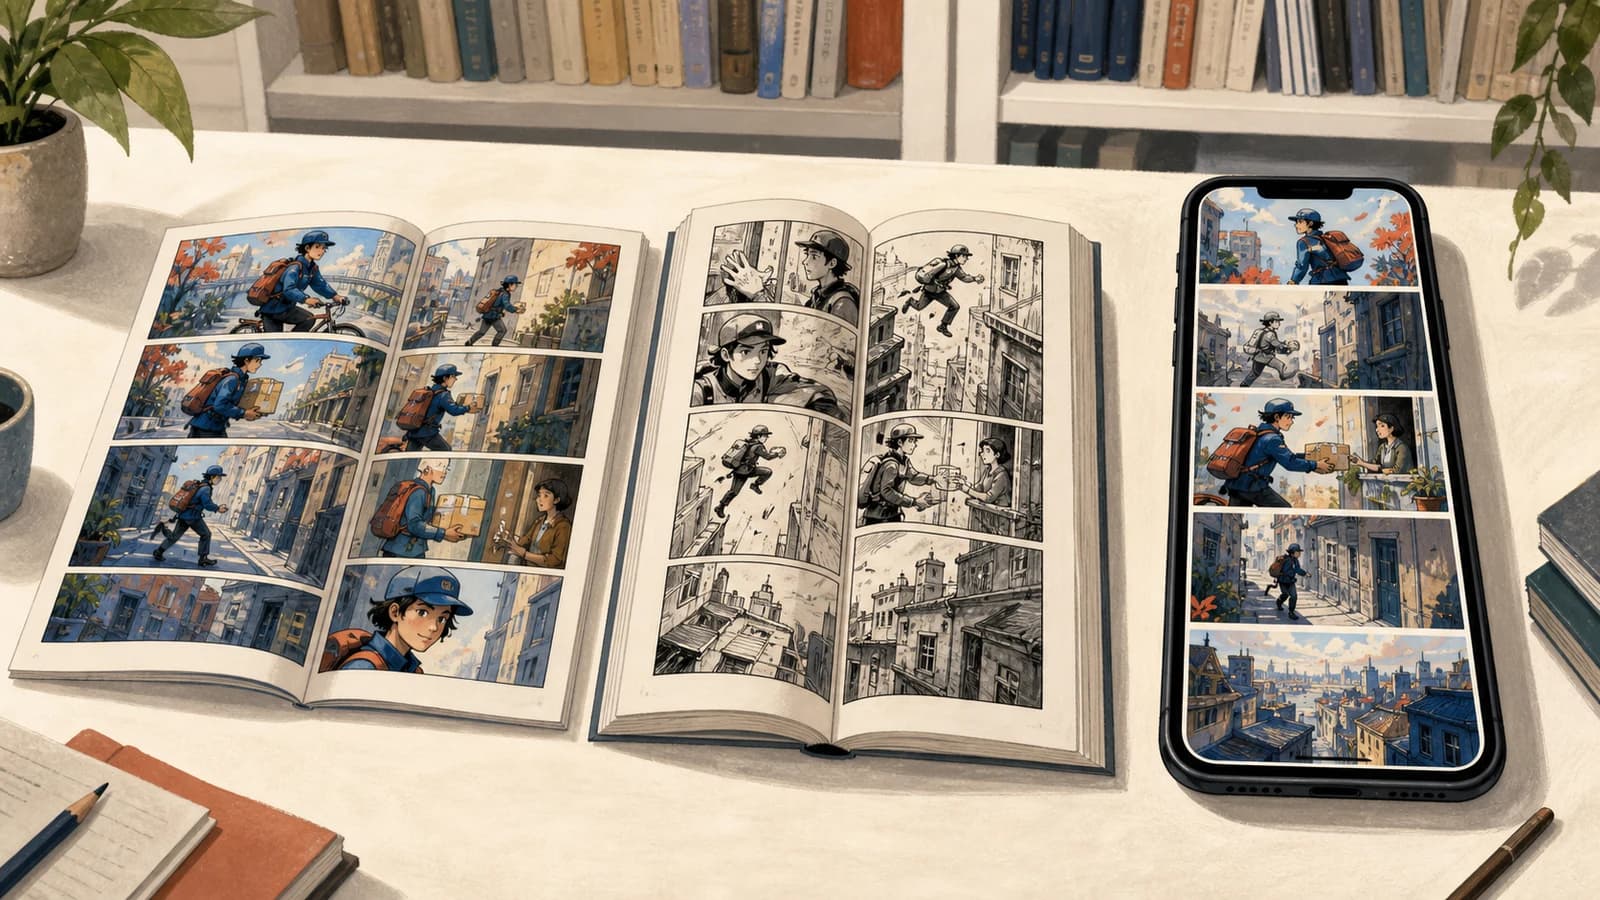
Do not start with canvas dimensions you found in an old tutorial. Start with the destination. A printed B5 book, a fixed-layout eBook, and a phone-first vertical episode create different pacing and composition constraints.
For print, ask the printer or publisher for finished size, bleed, safety margin, color mode, resolution, binding direction, and file format. Clip Studio Paint's official canvas documentation distinguishes the trim border—the final cut—from the bleed area that extends past it, and a safety margin for content that must survive trimming. Those are production constraints, not decorative guides.
For a vertical platform, check its current upload rules before drawing. WEBTOON CANVAS has documented automatic slicing of long episode images to fit 800 × 1280 px maximum image segments. Platform rules can change, so treat the publishing dashboard as the final authority.
Write these decisions at the top of the project brief:
- Format: print pages, digital page reader, or vertical scroll
- Reading direction: left-to-right or right-to-left
- Delivery target: named printer, marketplace, or platform
- Color plan: monochrome, grayscale, spot color, or full color
- Chapter scope: target page count or scroll length
- Update cadence: one-shot, complete chapter, or serialized episode
This prevents a common failure: composing dramatic spreads for a reader that displays one page at a time, or placing essential dialogue inside a print trim risk area.
2. Build a premise that can support one chapter
A premise is not a lore document. It is a compact statement of character, desire, obstacle, and consequence. Try this template:
When [inciting event] happens, [protagonist] must [concrete goal] before [deadline or consequence], but [opposition] makes the obvious solution impossible.
For example: “When a courier discovers that her final delivery contains a sleeping storm spirit, she must cross the flooded old district before sunrise, but every shortcut wakes the creature.” That sentence already suggests locations, escalating obstacles, a clock, and a visual payoff.
Next, define the chapter's reader promise in one line: “a tense nighttime chase that ends with a quiet moral choice.” This protects the tone when attractive side ideas appear. Save those ideas in a later-chapters file rather than forcing them into the pilot.
For a first short manga, limit the production variables. Two principal characters, two recurring locations, and one major set piece are easier to finish consistently than a war involving twelve named fighters. This is not a permanent creative limit; it is a way to reach a complete draft and learn from an actual reader.
3. Write beats before writing polished dialogue
A beat is a meaningful change in the situation. “They talk in the café” is a scene label; “Mina learns the café owner sold her route to the rival” is a beat. Each beat should change knowledge, power, emotion, location, or risk.
Draft 8–12 beats for a short chapter. A workable sequence might look like this:
- Establish the protagonist's normal routine.
- Interrupt it with a specific problem.
- Let the protagonist choose a response.
- Show the first cost of that choice.
- Reveal information that changes the plan.
- Force a harder second choice.
- Deliver the chapter's largest visual or emotional turn.
- Resolve the immediate question.
- Leave one earned reason to continue.
Now mark the beat that deserves a page turn or a long-scroll reveal. The setup should end before the turn; the answer should land after it. If the surprise and its explanation share the same initial glance, the reader cannot experience the intended pause.
Only after the beats work should you write dialogue. Read every exchange aloud. Characters rarely need to say what the drawing already proves. If a panel shows a hand shaking above an unopened letter, “I am nervous about opening this letter” spends space without adding meaning. A deflection, an unfinished sentence, or silence may do more.
4. Convert the beat sheet into a page script
A page script gives the drawing stage enough information without becoming a novel. Use one block per page and one numbered entry per panel:
Page 4 — five panels
Purpose: Mina realizes the package is alive.
Panel 1: Wide shot, stalled tram under heavy rain. Mina is small in frame.
Panel 2: Close-up of the package cord tightening by itself. SFX: tkk.
Panel 3: Mina notices; no dialogue.
Panel 4: The label changes from “FRAGILE” to “HUNGRY.”
Panel 5: Narrow reaction panel. Mina: “That wasn't there before.”
The “purpose” line is the editing test. If you cannot explain why the page exists, combine it with another page or remove it. For each panel, record only what affects staging: shot size, character action, essential prop, dialogue, sound, and any continuity condition.
Keep a separate dialogue document or spreadsheet if the chapter is text-heavy. Include speaker, page, panel, original line, revised line, and translation notes. Separating text from artwork makes proofreading and localization much safer.
5. Thumbnail the entire chapter before finishing page one
Thumbnails are small, rough plans. At this stage, circles and arrows are enough. You are testing reading order, panel weight, eye movement, page turns, and the ratio of action to reaction—not anatomy.
Draw every page at postage-stamp size, then place the pages in sequence. For print, inspect facing-page spreads and confirm which pages sit on the left and right. For vertical work, preview the scroll on a phone-width canvas and vary the empty space between moments. Empty space creates time only when it is deliberate; repeated giant gaps merely slow the reader.
Ask five questions during the thumbnail pass:
- Can a new reader identify the next panel without arrows?
- Does each page or screen contain one dominant moment?
- Are establishing shots present when location changes?
- Do close-ups appear at emotional decisions rather than at random?
- Does the page turn or scroll reveal happen after its setup?
If you want quick alternatives, use the AI Manga Generator to explore a scene's framing or tonal direction from a written prompt. Treat the output as a visual draft. Check anatomy, props, geography, continuity, and rights before incorporating any generated material into publishable art.
6. Lock the character and location reference pack
Consistency is easier when you define what “correct” looks like. Create one reference sheet per important character with front, three-quarter, and side views; a neutral expression; five story-relevant expressions; height relationships; recurring clothing; and small identifiers such as scars, earrings, bag straps, or shoe shape.
Add a restraint list. If a character's coat has four toggles, write “four toggles, never three or five.” If the story depends on which hand wears a ring, record it. These notes seem fussy until a flipped panel breaks a clue.
The Anime Character Generator can help you compare silhouettes, palettes, outfits, and facial directions before committing to a design. Use it for ideation, then redraw and standardize the chosen design in your own reference sheet. A prompt is not a model sheet, and a beautiful single image does not guarantee repeatable angles.
Locations need the same treatment. Make a simple floor plan for recurring rooms, note doors and windows, choose a north direction, and save two or three establishing views. When a chase crosses a location, plot the route. Readers may not consciously map the room, but inconsistent geography makes motion feel wrong.
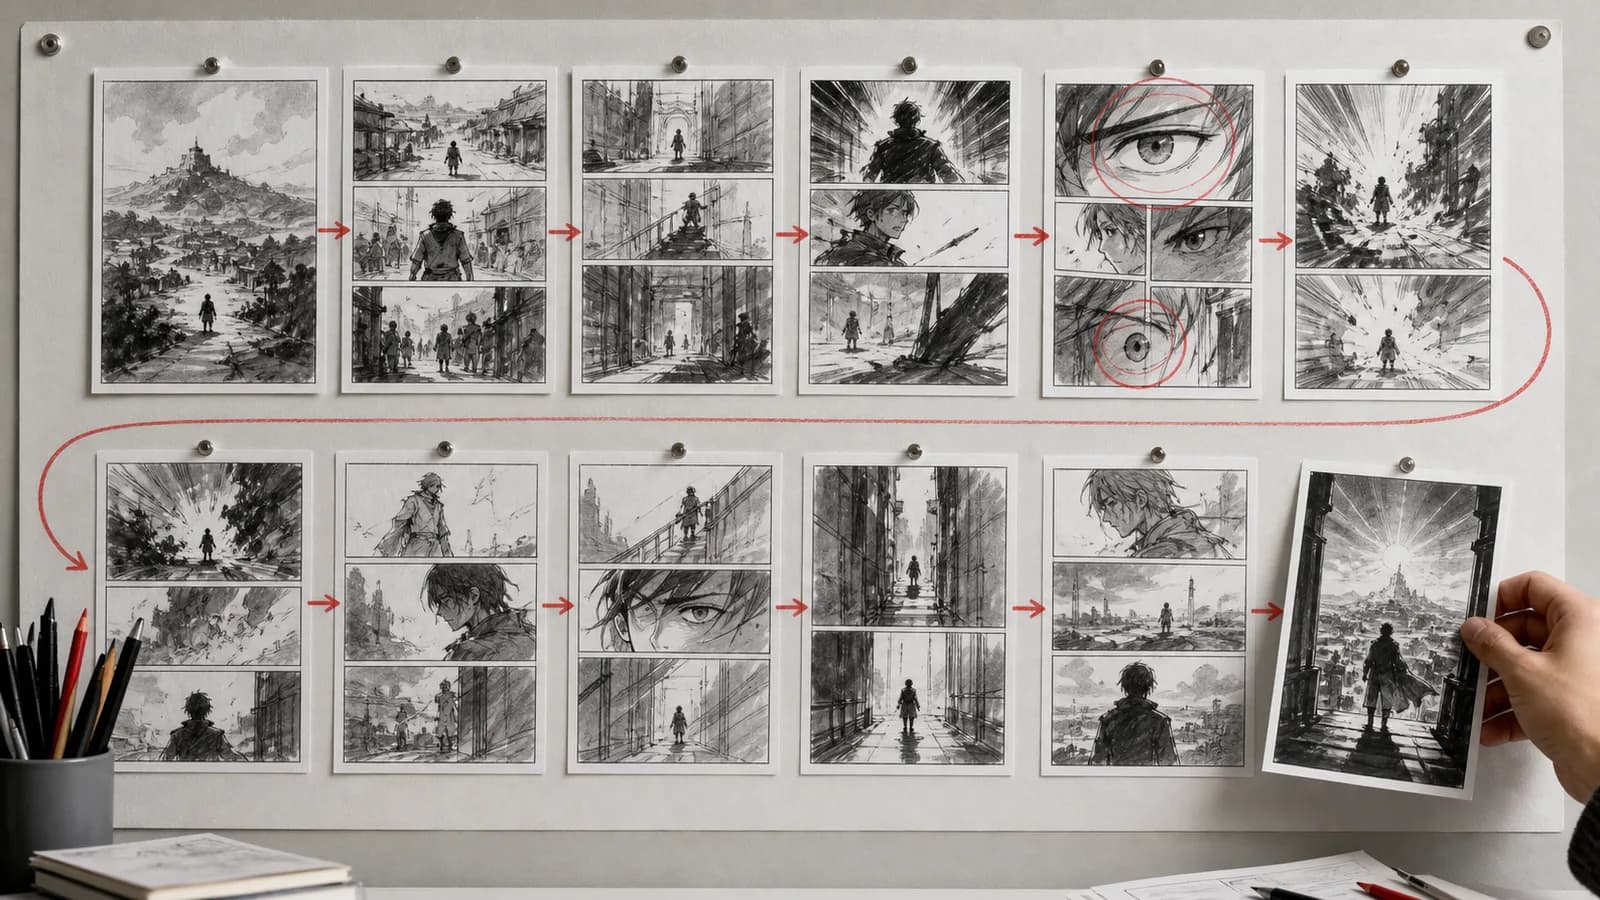
7. Produce each page in controlled passes
Finishing one panel completely before planning the rest invites continuity errors and uneven detail. Work in passes across the page—or across several pages from the same scene.
Layout and perspective
Import the thumbnail, enlarge it, and refine poses, horizon lines, and character positions. Place speech balloons with temporary text now; dialogue needs physical space. Check that important faces, hands, and clues remain away from the gutter and print safety limits.
Pencils or clean sketch
Resolve anatomy, props, costume details, and background construction. Compare every recurring element with the reference pack. Flip the canvas to catch proportion problems, but remember that flipping can reverse story facts such as writing, traffic direction, and handedness.
Line art, values, and tones
Choose a hierarchy. Thicker contours, solid blacks, controlled detail, and contrast should guide the reader toward the main action. Screen tones and effects should clarify material, depth, or mood; they should not make every surface equally loud. Test monochrome pages without relying on color distinctions.
Backgrounds and effects
Spend detail where it establishes place or supports a plot action. A full establishing panel may need signage, architecture, and weather. A small reaction panel may need only a tone field and a few directional marks. Reusing a location model is efficient; copying the same camera angle repeatedly can make the scene static.
Keep editable layers until final approval. A practical structure is one folder per panel, with separate groups for line art, tones/color, balloons, text, and effects. Name layers by function rather than “Layer 47 copy 3.”
8. Letter for clarity, not decoration
Lettering is part of pacing. Put balloons in reading order before finalizing the art, leave breathing room around text, and keep tails unambiguous. Avoid crossing tails when a quieter staging change can solve the speaker order.
Use a small type system:
- one readable dialogue face
- one restrained narration style
- one emphasis treatment used sparingly
- hand-built sound effects only where they add rhythm or information
Do not shrink type to rescue an overlong speech. Edit the line first, split the exchange, or change the panel count. Then test the page at the real target size, not only at 200% zoom on a monitor.
The Manga Speech Bubble Generator is useful for testing balloon shapes and placement plans. It does not replace proofreading or a final reading-order check. After placing text, hide the artwork temporarily and read only the balloons; the conversation should still progress in the intended order.
For translation, keep source text editable and allow expansion. A line that fits narrowly in one language may need more horizontal or vertical space in another. Avoid baking dialogue into the art until all localized versions are approved.
9. Proof, export, and publish a test chapter
Proof in separate passes. Trying to check everything at once lets obvious errors blend into the page.
Story pass
Confirm the protagonist's goal, cause-and-effect between beats, location changes, emotional turns, and final payoff. Ask a reader to describe what happened without your explanation.
Visual continuity pass
Check clothing, injuries, held objects, weather, time of day, screen direction, room geography, and right/left details. Compare repeated locations side by side.
Lettering pass
Check spelling, punctuation, balloon order, tail ownership, font size, line breaks, clipped text, and sound-effect consistency. Read aloud again.
Delivery pass
Confirm dimensions, resolution, color mode, bleed, file naming, page order, compression, and maximum upload size against the current destination requirements. Amazon Kindle Direct Publishing's fixed-layout guidance, for example, recommends images of at least 300 ppi for graphic novels and requires crisp, legible text. That does not automatically make 300 ppi the right setting for every platform; it shows why the final specification must come from the destination.
Export a proof copy and inspect it on the intended device or on paper. A thumbnail that looked balanced on a large monitor may feel crowded on a phone; a gray tone that looked distinct on screen may print too close to black.
A realistic seven-day pilot plan
If you are stuck in endless preparation, make a short pilot rather than “the series.” Here is a focused schedule for a 6–8 page sample or a brief vertical episode:
| Day | Deliverable | Stop condition |
|---|---|---|
| 1 | Premise, reader promise, 8–12 beats | Every beat changes the situation |
| 2 | Page script and rough dialogue | Each page has a stated purpose |
| 3 | Full thumbnails | Reading order works without explanation |
| 4 | Character/location reference pack | Recurring details are documented |
| 5 | Clean layouts and pencils | Poses, balloons, and perspective fit |
| 6 | Lines, tones/color, and lettering | Pages read at target size |
| 7 | Proof, corrections, and export | Delivery checklist passes |
The goal is not a masterpiece in seven days. It is a complete loop that reveals your real bottleneck. Your next chapter plan can then be based on evidence: perhaps dialogue took too much room, backgrounds caused delays, or the character design was hard to repeat.
Final manga page checklist
Before publishing, verify:
- The format and reading direction match the destination.
- Every page or scroll segment advances story, mood, or character.
- Panel order is clear at a glance.
- Important content stays inside safety limits.
- Character details and room geography remain consistent.
- Balloons follow the intended reading order.
- Text is readable at the final physical or screen size.
- Generated references have been checked and substantially directed by you.
- You own or have permission to publish every image, font, texture, and reference used.
- Export settings match the platform's current documentation.
- A second reader has tested the chapter without coaching.
Frequently asked questions
Can I make a manga if I am not good at drawing yet?
Yes. Start with a short, finishable chapter and use simple designs you can repeat. Clear staging, readable expressions, and controlled values matter more than ornamental detail. Thumbnail first, use references responsibly, and complete a small project so each revision is based on a real storytelling problem.
How many pages should a first manga chapter have?
There is no universal number. Choose a length you can finish while delivering one meaningful change and a satisfying immediate payoff. For a first test, 6–12 pages or a short vertical episode is enough to evaluate pacing, character consistency, lettering, and your production time.
Should I write the whole story before drawing?
Know the ending and major turning points, but you do not need polished dialogue for every future chapter. Fully script and thumbnail the chapter you are producing. Keep later chapters as beats so discoveries in the finished pilot can improve the larger plan without forcing a complete rewrite.
Can AI create the complete manga for me?
AI can help explore character directions, compositions, and visual drafts, but a complete manga still needs deliberate storytelling, continuity, editing, lettering, rights checks, and export decisions. Generated images can contain inconsistent anatomy, props, or text, so review and revise every asset before publication.
Should I make manga pages or a vertical webcomic?
Choose based on where readers will encounter the work. Pages support spreads, page turns, and print; vertical episodes support phone reading and timed scroll reveals. Converting later is possible, but it usually requires recomposing panels and balloons, so select the primary format before thumbnails.
Sources and further reading
- Clip Studio Paint: Creating a New Canvas — trim, bleed, inner borders, safety margins, and multi-page settings.
- WEBTOON CANVAS: Uploading Long Episode Images — documented automatic slicing and maximum image-segment dimensions.
- Amazon KDP: Fixed-Layout Books and Virtual Panels — graphic-novel metadata, reading direction, image resolution, and legibility guidance.
- WEBTOON CANVAS Content Guidelines — current creator responsibilities and intellectual-property rules.
Making manga becomes manageable when each stage has a clear decision and a clear stop condition. Finish the story in beats, prove it in thumbnails, standardize what must stay consistent, and only then spend time on polish. When the pilot is complete, use what actually slowed you down to design a better second chapter.
Author

Categories
The manga workflow at a glance1. Decide where the manga will be read2. Build a premise that can support one chapter3. Write beats before writing polished dialogue4. Convert the beat sheet into a page script5. Thumbnail the entire chapter before finishing page one6. Lock the character and location reference pack7. Produce each page in controlled passesLayout and perspectivePencils or clean sketchLine art, values, and tonesBackgrounds and effects8. Letter for clarity, not decoration9. Proof, export, and publish a test chapterStory passVisual continuity passLettering passDelivery passA realistic seven-day pilot planFinal manga page checklistFrequently asked questionsCan I make a manga if I am not good at drawing yet?How many pages should a first manga chapter have?Should I write the whole story before drawing?Can AI create the complete manga for me?Should I make manga pages or a vertical webcomic?Sources and further reading
More Posts
Production guides
Anime Camera Angles: A Practical Storytelling Guide
Plan anime camera angles that clarify story, emotion, and screen direction. Compare shot sizes, build a shot list, and write prompts you can test.
Production guides
Comic Panel Layout Guide: Control Flow and Pacing
Use this comic panel layout guide to plan readable grids, gutters, focal panels, dialogue space, page turns, and mobile-friendly story flow for print or phone.
Production guides
Comic vs Manga vs Manhwa: A Practical Comparison
Compare comic vs manga vs manhwa by publishing tradition, reading direction, color, layout, serialization, workflow, and the format your story needs most.
Newsletter
Join the community
Subscribe to our newsletter for the latest news and updates